I have a sincere love of furniture makeovers. I have a small collection in the attic of furniture snatched up with fervor from our local thrift stores that have just been sadly sitting there since they were brought home. But, with extra time on my hands these days, I thought it was time to pay these little guys the attention I quietly promised them while crouching on the dirty linoleum at Amvets.
Example A.) Beat up bench from 1972. I've always secretly coveted benches I've seen in other homes. Not that I'm ever very tempted to sit on them, but I feel like they're a great, albeit under appreciated piece. Stick them in a weird nook or at the end of the bed. Any place you're not sure what to put there but that space looks so empty? BENCH. (This bench also came with a back rest, but I was sure that I didn't have enough fabric so I didn't include it in the before shot. Turns out I did have enough, so you'll see that little guy pop up later.)
Lets take a look at what you're going to need:
Not too scary. Find a fabric you want (I went to Joann Fabrics armed with coupons for use on regularly priced items, but it turns out all those regularly priced items are about $30 a yard. Never disregard the clearance section, I found this gray, swirly fabric I loved instantly for $6.99 a yard. BOOM.), scissors, staple gun and staples. I intended to redo the bench legs as well, so I busted out the best brush around, sandpaper, and paint.
If you're going to redo the legs, start with sanding them up. You're going to have to wash them to make sure you get all the dust/general grossness off and you may as well let them start to dry while you're tackling the fabric.
Yes, that is my pale, bony hand. Since I'm going to be painting them, I'm not worried about getting a lot of the stain out. Just a quick sanding to get off any dirt and gloss. Then wash those guys off and leave them to dry while you lay out your fabric. A lot of benches and chairs that have an upholstered seat will just lift right out of the rest of the piece resulting in making it incredibly easy to just fold the new fabric over, staple it down, and then screw it right back into place.
But then there's always the other type. My bench is just one giant piece with four little legs screwed in.
After figuring out exactly how much fabric you'll need after factoring in the wrapping around of cloth, its time to figure out how you want the cloth to lay. Those corners are tricky, and I decided it was fine to see a little fold in each corner as long as they looked even and intentional.
Insert about an hour and a half here of me folding and refolding corners of fabric:
Make sure you use tape or pins here while experimenting! You'd don't want to jump the (staple) gun, only to have to rip out all the staples if it turns out you don't like the way it looks!
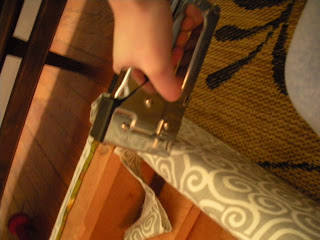
After you've decided you like the way its looking, get stapling. I probably put in more staples than is really necessary, but I've always been the better safe than sorry sort.
I used this same method on the seat back that I mentioned earlier, resulting in this:
Check to make sure your table legs are dry! Now you can paint them as you wish, but I chose to screw them right back into the table and handle them that way (the color I used was 'Polished' by Behr).
I know its tempting to just slather on the paint and have it be done, but (especially if you're working/testing gravity at the same time like I was) don't rush it! You'll get the dreaded goopy paints drips and then you'll have to sand and repaint anyway. Unless that sort of thing doesn't bother you, then go for it. Better to put it on thin, almost like a primer. Its okay if some wood still comes through, the second coat takes care of that.
After the two coats, the bench was almost finished:
We just attached the seat back by poking holes through the fabric, through the already drilled holes and attaching them with a simple washer and nut combo, resulting in the finished bench!
How much did it end up costing?
Bench: $4.00
1.5 yards of fabric: $10.97
1 qt. of paint: $14.48
Total Cost: $29.45
Sweet, new(ish) bench for under $30? Go us.


Great job! I found your blog in browsing Buffalo based blogs. I can relate to your collection in the attic - mine is in my basement. 2 wing chairs I bought last winter after signing up for a reupholstery course through Buffalo Public Schools Adult Ed classes - which sadly got canceled because only THREE people signed up! Then 4 dining room chairs (in addition to the 4 I already have that need to be recovered!), and 2 slipper chairs.... all of them found in different places, and all of them the same shade of 70s orange. Its so fun rescuing pieces and planning how you'll give new life to them, picking out fabrics etc, but I always seem to stop short of actually DOING something with them! take care, and keep blogging!
ReplyDelete